Digital Peripherals – Plant Temperature (PT) Camera
Plant Temperature (PT) Camera
This device measures the temperature of a wide area of the canopy, using an infrared sensor. When aimed at the center of the crop, it will monitor and display the temperature of the canopy.
In the menu, the nominal plant temperature and a deviation (sometimes called bandwidth or an interval) can be configured. When the main lights are on and the temperature falls outside of the this interval, the auxiliary lights will blink blue (for cold) or red (for hot). When this happens, the output power is not scaled back automatically. A Smart Controller is required to adjust the output power depending on the temperature. When the lights are off or when it is scheduled night, it will do nothing.
The status screen always shows the current plant temperature.
When bought separately, the Plant Temperature Camera includes a swivel mount and cap for the fixture, This must be installed to the right of the buttons by replacing the existing plastic cap. A Philips #2 screwdriver is needed for this.
To install:
• Take the swivel mount, without the camera attached, and use the side knob to thoroughly tighten the ball
• Screw the swivel mount tightly into the end cap
• Screw this combination into the PT camera
• Loosen the ball until the swivel mount separates
• Unscrew the plastic end cap to the right of the buttons ( using a PH2 or PZ2 screwdriver)
• ⚠️ Don’t touch the electronics as it may cause a static discharge
• Using the same screws, screw the new end cap in place. It will only fit one way, with the bulb on the inside (camera mount screw-hole on the outside) and the curved side in line with the curve of the fixture
• Put the camera ball back on the plate and half tighten
• Connect the camera to the fixture (using the OUT1 port) or to the last fixture add-on
• Aim the camera at the center of the crop directly under the fixture and tighten the ball
To use:
 |
To use this feature:
|
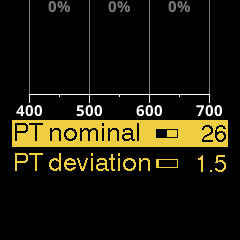
The PT nominal and PT deviation settings are related like this:

To test:
• Turn on the outputs in any way you see fit. Also, make sure the schedule is inactive or in day mode. Turn the intensity down to make it easier to see the PT warning
• Go to the Status screen and take note of the PT temperature
• Navigate to the Sensor settings menu
• Set PT deviation to a small value like 1.5°C
• Decrement the PT nominal value to a few degrees below the measured PT temperature
• Check if the auxiliary lights blink blue
• Increment the PT nominal value to a few degrees above the measured PT temperature
• Check if the auxiliary lights blink red
• When it doesn’t work, double-check the PT temperature in step 2 above
ℹ |
When using your hand to test the PT camera, be aware that your skin be surprisingly cold, even equal to or below room temperature. |
⚠️ |
Only a single Plant Temperature camera should be connected to the same fixture at the same time to prevent undefined/unwanted behavior. |
ℹ |
Connecting multiple PT cameras to different fixtures in the same chain is fine, and will increase the probability of detecting leaf temperatures that are outside the desired ranges. |